SBIG STT-3200ME
A new SBIG camera was delivered to me by Ad Matthijs (Astrotechniek)
on 17 February 2013: a STT-3200ME with Selfguiding Filterwheel
(FW8G-STT as it is called by SBIG). You can find all details concerning this camera and accessories on
the website of SBIG
of course. The camera comes in a Pelican case, a little larger
and thicker than the Pelican cases for the ST series cameras but
smaller than the STL camera cases.
This
camera is to replace my SBIG STL-4020M (sold) and is complimentary to my SBIG ST-10XE with
CFW-8. The new camera has the same type of CCD
as in the ST-10XE (KAF3200-E) but with the microlenses (KAF-3200ME) as
in the ST-10XME. These microlenses in the STT-3200ME should get
more light into the pixels and make the camera more sensitive than the
ST-10XE that has the sensor version without microlenses.
A surprise, that I only
learned after submitting the order, is that the FW8G-STT does not have
the "normal" T-thread connection (M42x0.75 metric thread) but the
larger STL-camera type threads to connect the nosepiece or to connect
to the telescope (STL thread is 2,156"x24tpi). This meant that I
had to check and change the adapters that I used with the STL-4020 and
ST-10, because off course the backfocus distance of the new camera with
filterwheel is different as well (54 mm).
Drivers:
Together with the new class of
cameras that SBIG has launched in the past years, they also updated
the drivers so they can be used on 64 bit PC systems. The utility
that SBIG ships with the cameras (or can be downloaded from their website)
is the SBIG DriverChecker, now renamed DriverChecker64. If this
is the first SBIG camera that you use, you will be using these new
drivers of course. Owners of older cameras, like me, must make sure
to follow the instructions in the handbook, als the old DriverChecker
program and older drivers must be removed from the PC before installing
the newer types of drivers and camera. After installing the new program and
new drivers, you must also re-install the older cameras that you still
have, I had to do this for my ST-10XE and my ST-402 cameras.
Software:
For
imaging and basic image processing I am using Software Bisque's CCDSoft
V5. While I was waiting for the camera to arrive, I was
astonished to read on the SBIG Yahoo!Group that CCDSoft did not support
the STT series, although this program was still mentioned in the
documentation. SBIG worked with Software Bisque so that, only a few
weeks before the camera arrived, an updated version of CCDSoft was
avaible that can connect to this new camera. However, Software
Bisque have announced on their webpage that they consider CCDSoft to be
"legacy software" and as from mid 2013 it will no longer be supported!
So it looks that I will either have to upgrade my planetarium
program TheSky6-Pro to the successor TheSkyX with its camera control
extension (if this supports STT cameras), or change to MaximDL...
I
use Software Bisque's TheSky 6 Professional. One feature of the
program is that you can superimpose the field of imager chip and
autoguider chip over the starmap. The program has the default
data e.g. for the SBIG ST-10XE and it's autoguider. For the
STT-3200 the ST-10XE overlay will work for the imager chip but not for
the autoguider chip because the user can change the position of the
autoguider relative to the imager and the autoguider contains an extra
compressor lens so that the image scale is different on the autoguider
(different focal length).
In
TheSky6, the user can specify or edit the field of view overlays, both
for the imager chip and the autoguider chip. I selected the
ST-10XME+ST-237 overlay and edited it to read STT-3200ME + KAI-0340
(Mewlon) and a second instance STT-3200ME + KAI-0340 (TEC140). Both these telescopes work at f/7, with the extra autoguider focal reducer this becomes f/5. So,
instead of size in mm I used the f/7 field of view size in arcminutes
for the imager and the f/5 field of view size in arcminutes for the
autoguider, this for each telescope separately. The offset of the
autoguider (Element 2 as it is called in TheSky6) was determined, after
adjusting the pickoff mirror, by centering a star on the imager chip
(oriented N/S E/W), noting the declination, then moving the star to the
middle of the autoguider chip and noting the declination difference in
arcminutes. This was then used in TheSky6, detector data for
field of view, in the STT-3200 the autoguider is in the same position
relative to the ST-10, that is in the direction of the cables.
The
offset measured for my Mewlon 300CDK with reducer is 23', for my TEC140
with fieldflattener it is 47'. Note that the image of the
autoguider is 180° reversed with respect of the image of the imager.
Also, it seems the KAI-0430 chip is an ABG sensor. Below or
two images taken with the autoguider.
Filterwheel:
There
is a separate concise manual concerning the installation
of the FW8S-STT/FW8G-STT filterwheel. To
fix the filterwheel to the camera, this is simple: remove the cover and
attach the filterwheel housing in its place.
Contrary to what
its designation suggests, the CFW-8 filterwheel for the SBIG ST-10XE
camera can contain only 5 filters, I have Astrodon LRGB filters and an
Astronomik H-Alfa filter inside in the CFW-8. These are screw-in filters of 1,25"
diameter.
The
FW8G-STT filterwheel, as its designation correctly suggests, has the
possibility to
hold 8 filters, my camera has a complete Baader LRGBC filter set
plus Ha 7nm, O III and S II filters installed. These filters are
unmounted and are 36 mm diameter, 2 mm thick. Depending on the thickness of
the filters, you have to use supplied O-rings either in front or behind
the filters or no O-rings at all. As I use Baader filters, I
needed to put the filters in the filterwheel first, then on each filter
an O-ring and then the plate that keeps everything in place. Be
sure to wear gloves to insert unmounted filters so you don't leave
fingerprints, it is quite fiddly to do.
Autoguider:
The cover of the FW8G-STT
contains the autoguider. The covers can be interchanged, e.g. if you
would want to use camera lenses with the filterwheel, you will need the
FW8S-STT without the autoguider to be able to do so. The FW8G-STT
is to thick to allow the use of e.g. Canon EOS lenses.
While
in the
ST-10XE the main and autoguider sensors are built in the camera
housing, in the STT-3200ME the guiding sensor is either integrated into
the
filterwheel and sits in front of the filters or you have to use an
external guider. The fact that in the FW8G the guider is in front
of the filters is a bonus
when imaging through (narrow band) filters. Drawback is that the
autoguider CCD is not cooled in this case.
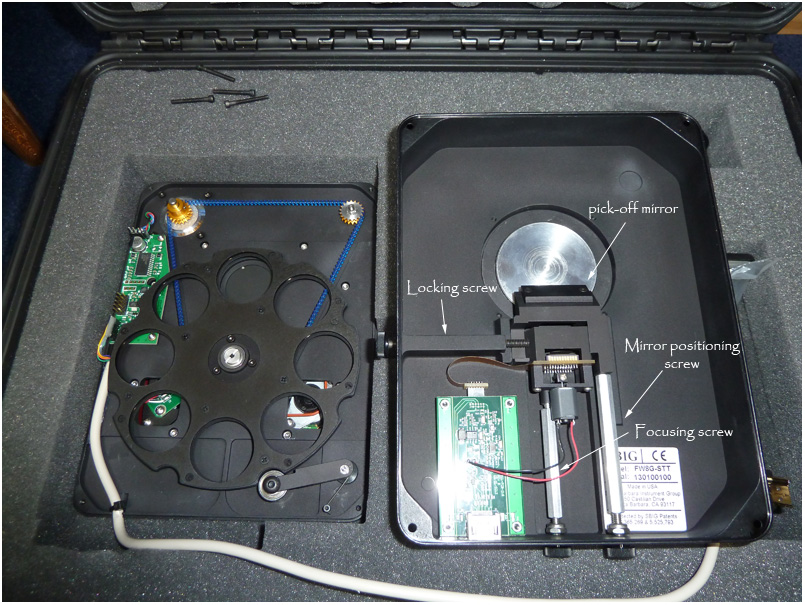
The pick-off mirror
that directs light to the autoguider CCD can be moved in the lightpath
so that the position can be adapted to different sizes of CCD Sensor
and can be adjusted in the lightcone of the telescope. After the
pick-off mirror is adjusted, the autoguider
can be focused separately, so after focus on the imaging CCD is
achieved, one can adjust the focus of the autoguider CCD.
A 0.7x reducer lens is mounted in front of the autoguider
CCD. Also,
the manual states "the star images on the tracking CCD may not be as
good as your imaging CCD, since the focal reducer reduces the F/number
by 0.7x, and you are quite a way off axis. This is not a problem
for guiding".
If you use only one telescope, or telescopes with a equal F/D value, you
will only need to adjust the pick-off mirror and focus once (similar
light cones). If you use telescopes with a large difference in
F/D (e.g. f/10 and f/4) you will need to adjust the pick-off mirror for
each telescope so you don't get vignetting. As the KAF3200 CCD is
the smaller one in the STT series, the pick-off mirror can be adjusted
quite close to the sensor edge. There are three screws used to
adjust the autoguider: a locking screw, a screw that moves the pick-off
mirror in/out and a screw that adjusts the focus. These
screw-systems are not what I would call "high precision", there is some
play that one can feel when adjusting, but then they normally
don't need to be used often. So, on first use one needs to adjust
focus of the imager, then take flat frames with the telescope and
adjust the mirror so that the pick-off mirror does not induce
vignetting on the underside of the image (as it is presented on the
screen). When this is done, point the telescope to a star again,
make sure focus of the imager CCD is OK and then adjust the focus of
the autoguider. When taking images with the autoguider, a
clicking noise is heard, this is a shutter in the
autoguider assembly so that the autoguider can take its own darkframes
and can close the shutter between downloads. While
adjusting the autoguider, the screw on the side of the FW locks both
the movement of the mirror and the focus position. As mentioned
in the manual, after adjusting the position, it is a good idea to put
some tape on the screw that adjusts the position so you do not change
position while you want to adjust the focus.
Power supply:
During the first use of the camera to check it out and to take dark frames, I noticed
that the camera lost power frequently when moving it.
I had read about this
behaviour on the SBIG list, also with other cameras that have the same
type of power connector. All it takes is to spread the tines in
the power connector a bit with a small bladed screw driver,
so that this center pin makes better contact. The power supply
delivered with my camera is a transformer converting 220 V AC to 12 V
DC. The cables are thick and get quite stiff at lower
temperatures (say below 5°C). So make sure to attach the power
cable in a way that it will not offset balance of the telescope. My
SBIG dealer provided an extension to the power cable, much lighter but
without the locking screw. I just plug this in and fix the cable to one
of the handles so it is secure during use, this puts much less strain
on the combination than the original heavy cable.
Connections:
The
connection between the filterwheel/autoguider with the camera is done
with cables. The filterwheel cable (too long) needs to be plugged
into the I2C connector of the camera, the autoguider connects with a HDMI type
cable. These cables then more or less protrude from the side of the
camera, so take care they don't catch on something while imaging.
It is impossible to put the camera + filterwheel into the case
with the cables attached, so you have to disconnect them to store the camera. Then
the combination camera + filterwheel fits nicely in the case.
First use:
I waited to mount the
filters
until I had done some tests and after making a first series of
darkframes to compile a darkframe library for this camera.
Installation of the new camera went well, the shutter and
filterwheel worked OK, cooling was fast and the download of an image
from this camera is
FAST (about one (yes 1) second versus about 25 seconds on the ST-10XE.
The noise of the two fans on the camera is noticeable and varies
during the cooling sequence. This cooling is also remarkably fast.
On the first try to adjust the position and focus with my Takahashi Mewlon 300CDK and reducer, the imager chip
had the star Pollux in it's center. When taking images with the autoguider, I saw two very distorted images on
the autoguider but could not focus on these - however clouds
prevented more testing that evening. The evening after, I put Castor on the imaging
chip and focused, then moved the star until it appeared on the
autoguider chip and focused, then locked the autoguider. The
distortion of the stars on the autoguider image was negligible, so I
guess what I had mistaken for distorted stars the first time were
probably reflections from bright Pollux!
Due to the different image scales of the imager and autoguider, I think you need to calibrate the
autoguider using the autoguider chip only (with e.g. SBIG ST-10 you can
calibrate both with imager or autoguider chip).
I did some
autoguiding tests while the imager was taking a series of pictures with
different filters, this worked very well - as the autoguider sits in front of the
filters there is no change in luminance of the guide star anymore of
course . This second session was again over due to clouds, the "new
equipment curse" is quite strong with this camera ;-).
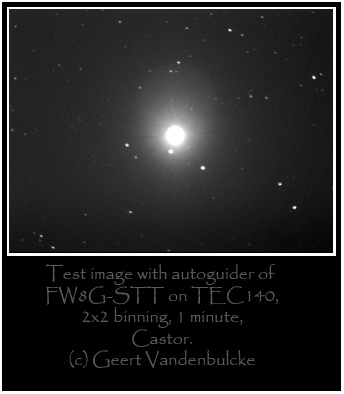
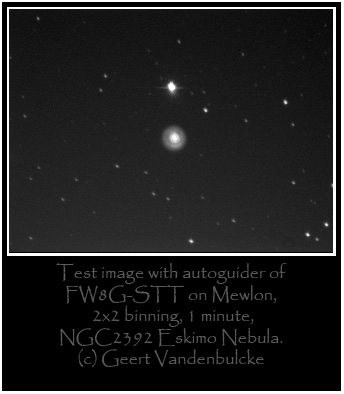
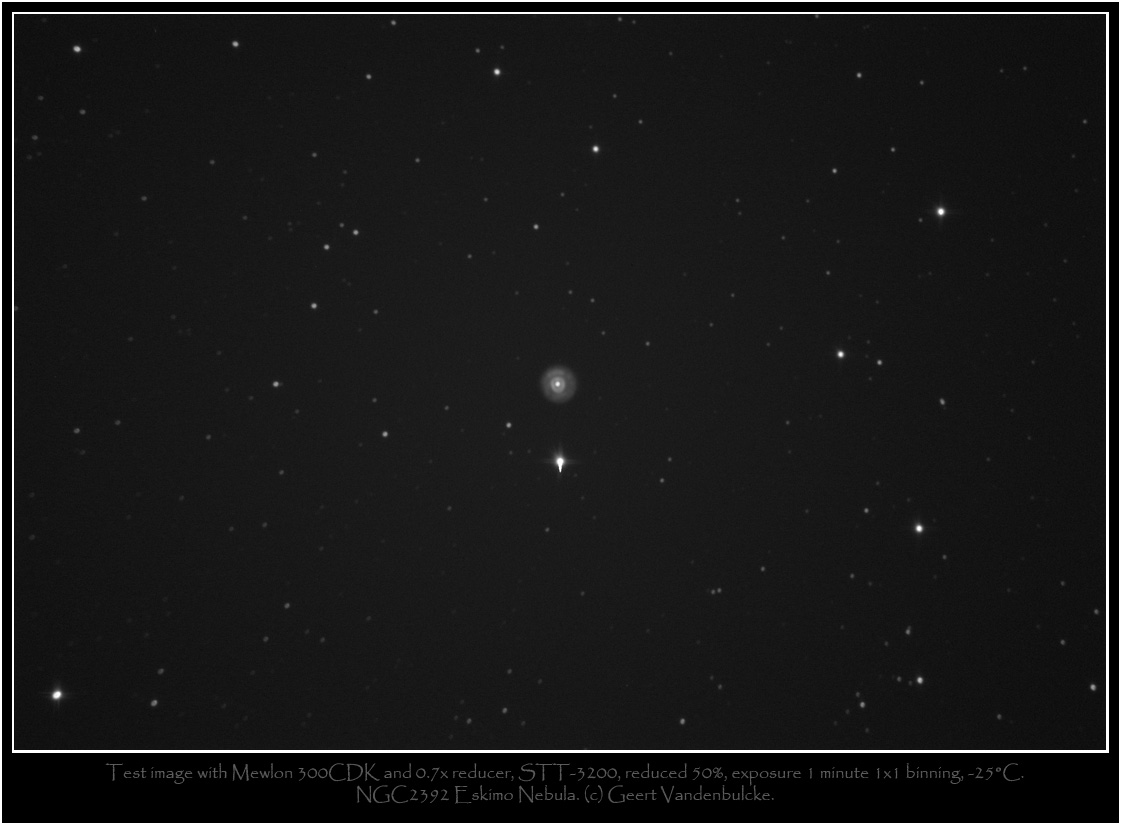
On
29 March I could continue with some tests, below are two images each 1
minute exposure, these images are reduced 50% for this webpage.
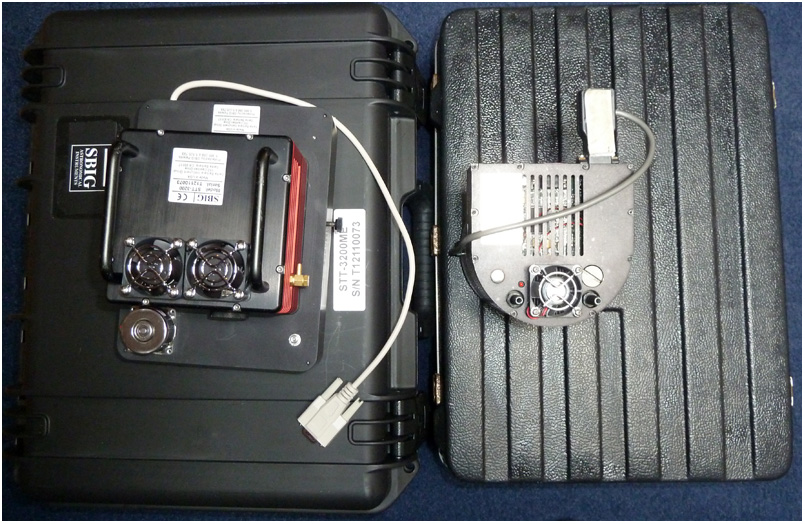
Camera size:
The
STT-3200ME with the FW8G-STT is noticeably larger and heavier than the
ST-10XE
with the CFW-8. On the photo below, you can see my old SBIG ST-10XE
next to this new camera. The ST-10XE with CFW-8 weighs 1500 gr while
the STT-3200M with the FW8G-STT filterwheel weighs 2400 grammes. The
camera body of the STT-3200ME measures about 120x120x105mm (including
the handles). The FW8G-STT filterwheel measures 210x160x45mm.
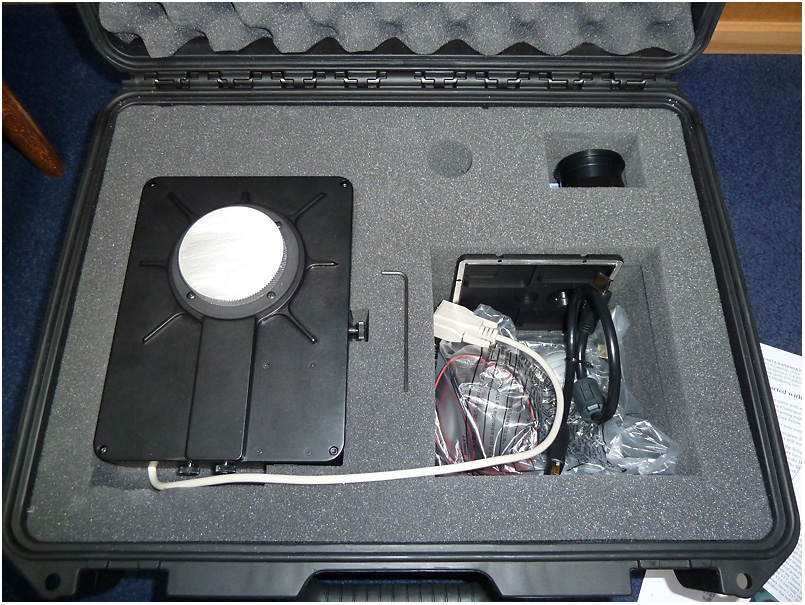
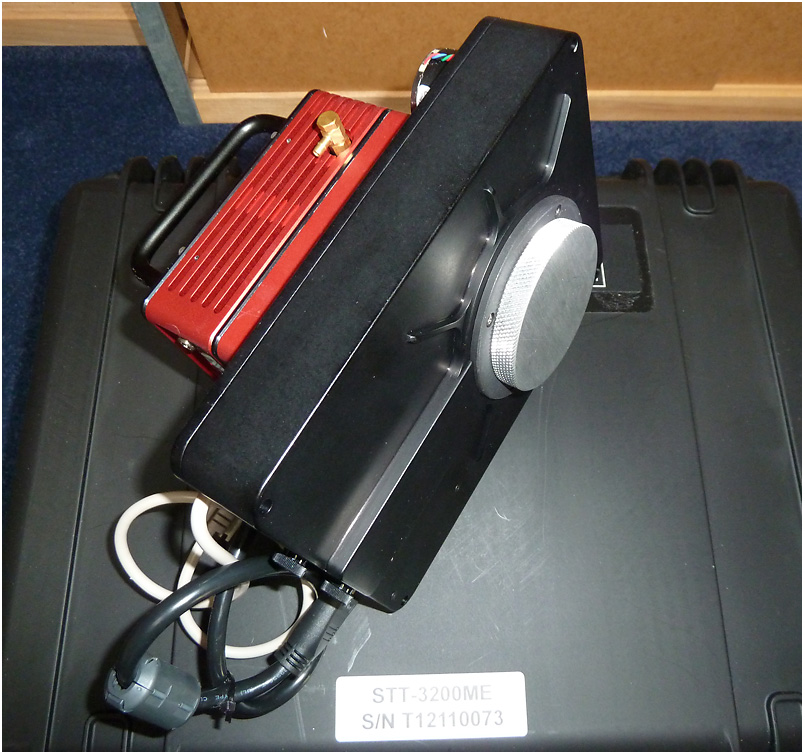
Here
is a picture showing how the camera fits in the Pelican case, the white
disk is an aluminum plug to close the camera when not in use, I had
this plug custom made:
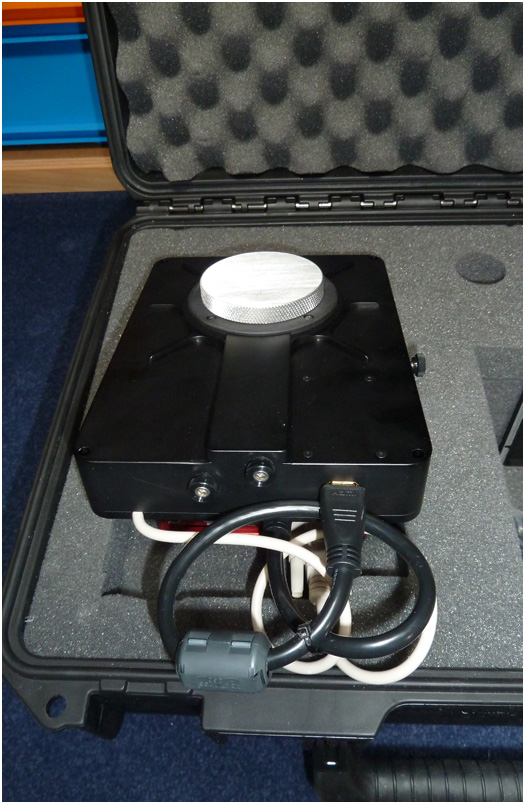
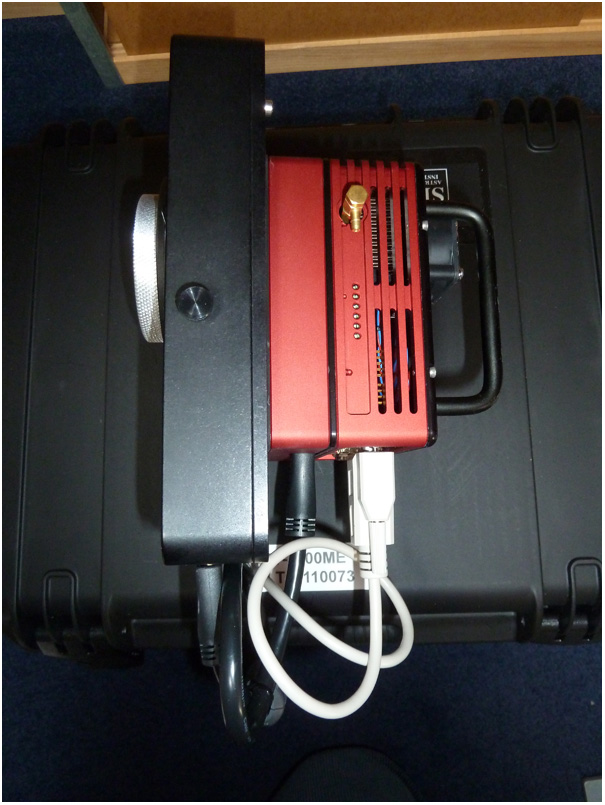
This picture shows why the camera does not fit in the case with cables attached:
Some pictures of the camera from different angles:

Below
is a picture taken when the filterwheel was open to add the filters in
the filterwheel, you can also see the inside of the autoguider cover: