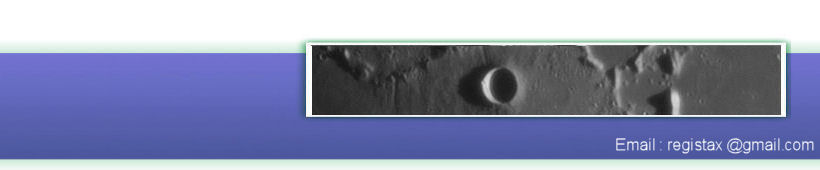
The goal is to make a high quality Jupiter animation from captures lasting a few hours !
The starting pool consists of 384 colour AVIs acquired
during a recording session of about 5 hours in separate pieces of 45s at 22 fps. The total amount of frames was
384 000
which use (codec HUFYUVx64) about 107 Gb of hard disk
space ! When I did the acquisitions I allready knew that RegiStax6 was
faster (multicore) and there would be a better Batch module. I
estimated that if I was going to execute the actions needed to make a
high quality animator of Jupiter manually it would take about 20
hours of non-stop
work (on a 4Ghz 8 core PC with fast hard disks). The new Registax Batch has some tools that are experimental but you can work
nicely with them.
RegiStax processes each file that is added to the batch using a set of macro commands, I wanted to create a macro that would:
-
Align / Limit using "Best frames" and in this case of 1000 frames a value of 950 to eliminate worst frames) / Stack
-
In the Wavelet page use RGBAlign, Auto- RGB Balance, Contrast & Luminosity, Histogram stretching and Gamma, linked Wavelets and finally Masking (for controling border artifacts)
-
Save the result as PNG.
After running the macro's for each
file in the batch all the saved PNG's would be
re-loaded in a new 'normal' session of RegiStax6 to be aligned again
(to centre the planet) and saved as a new AVI at Stack page to serve as
an animation.
Step by Step Explanation
Now let's explain step by step how to
make RegiStax6 do this large amount of work for me :)
1) We need to process a single avi of the batch to create the
Macro-command settings we want to use for several parts of the
processing in RegiStax.
2) Load an AVI from the middle of the total serie eg. (here 166.avi)
3) Process this as you want to do with all of the files : Set align points (parameters), Align (parameters) , limit (parameters), stack and enter Wavelet page.
At the Waveletpage open all the tools you want to
use and set the tools to create a resulting image like this:
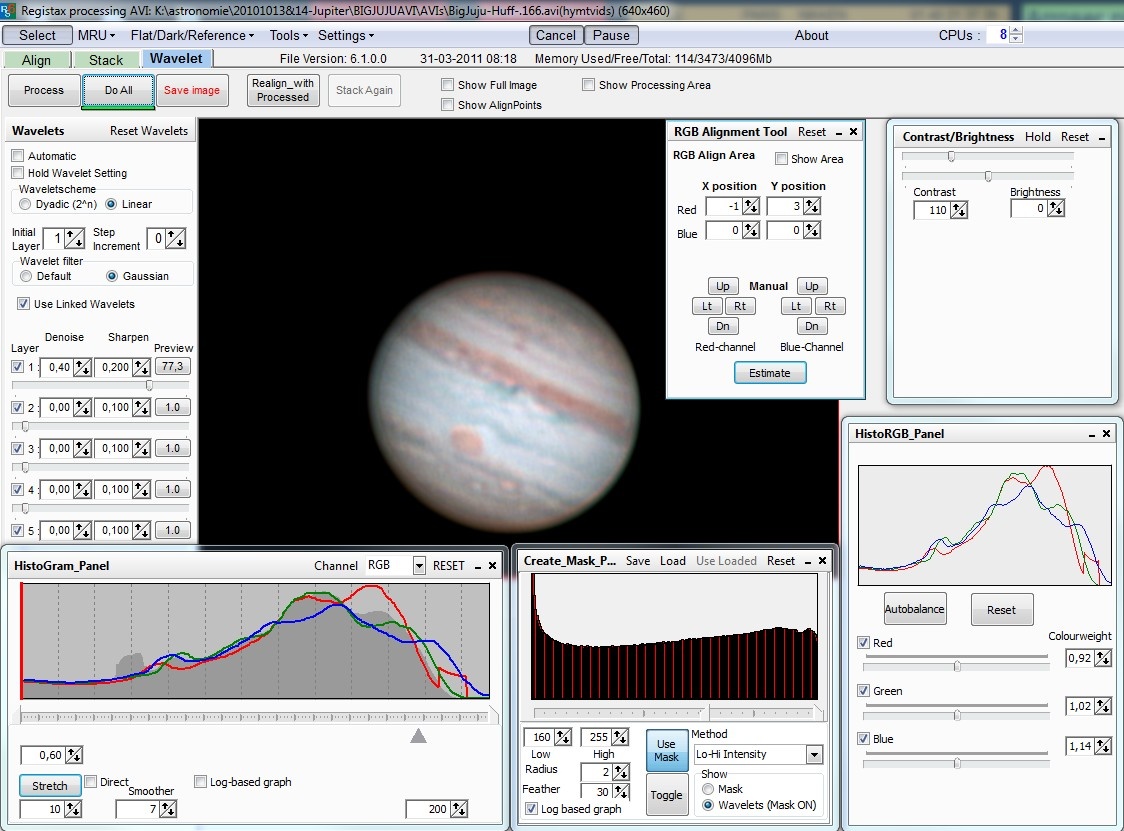
To achieve this Ive done the following inside wavelets:
a) I opened RGB align, made sure the RGB-align area (green square) was nicely around the planet then click on Estimate to do the RGB-alignment.
b) I opened RGB Balance and clicked on the Autobalance button.
c) Set the Wavelets to find a good compromise between resolution and noise
d) Set Contrast and Brightness
e) Open the Histogram and move the midpoint (triangle) and stretch the histogram.
e) Use Masking, I set the parameters to eliminate all border artifacts and also have a nice 3D effect.
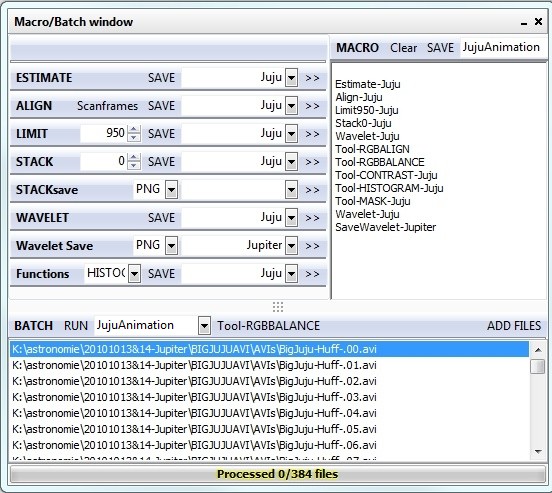
After this I was ready to use these same settings for all my files in the batch, but to do this I first needed to create a macro. Since I planned to use the more advanced (and partly experimental) parts of the batch module I need to set « Show Advanced Controls » then after setting that open the Batch module from the Tools Menu .
After opening the batchmodule ![]()
Since we have allready set all the parameters we only need to do the following to create a macro:
For the sections Estimate and Align, press SAVE and then press
">>". This saves the settings to set alignpoints and ">>"
"copies the command to the macro-window.
For section Limit type 950 (the
number of frames we want to use) and make sure you press ENTER (to change the number) since I want to remember this for
later processing I also add a name (Juju). Again press save and then
">>"
Then for the sections Stack, Wavelet name them Juju and press Save and ">>"
Now we create macro's for the advanced functions :
First select function RGBAlign, press Save and ">>"
Then select function RGB Balance , press Save and ">>"
Then Select Contrast Brightness, name this Juju, press Save and ">>"
Then Select Histogram, name this Juju, press Save and ">>"
Then Select Mask, name this Juju, press Save and ">>"
And finally from the default functions use Wavelet, change the name into Juju, Press Save and ">>" since we want to save the result we select Waveletsave, Select PNG as the format, name it JUPITER and press ">>"
Now we have created the macro and
we can save that also by changing the "default" part above the macro
and giving it a name like jujuanimation.
Next step is to add the files that need to be processed in the batch using "ADD FILES".
You should have now something like
this :
Since this processing will take quite a bit of time to run make sure to check the following for your PC:
-
Check that the PC won't shut down or goto sleep for any reason during this long work.
-
Be sure that you don't need to work on the PC (best time is before going to bed).
-
Be sure you have enough space on your hard disks (PNG files are large)
Then hit RUN.
-
Check if everything looks Ok during processing for a couple of AVI.
-
Open the directory containing a just created PNG to check …
In case you need to abort Batch to make any change ...
1 Press CANCEL to stop the processing.
2. Close batch window
3. Most important : Wait for process to reach Wavelet page !
4. Then hit Cancel (Main menu bar) and "Yes"
5. manually redo the configuration of all the tools on screen as at the first time (Process wavelets, set Contrast/Luminosity, Histogram gamma and stretch, masking). Check result, Select in Batch/RUN/ --> JujuAnimation, click on first batch file to process and now only re-Run.
If all is fine you can now leave the PC unattended for some hours...
To create my animation I start by reloading all the saved PNGs into RegiStax as if they were source images. But as there were large differences in the position of the planet between the images I decided to align using 2 alignpoints placed on the rim of the planet but at opposite sides of the equator. I align the images and at the stacking page I used the Save AVI function. The created AVI I have converted to gif to show it (shrinked) at the internet.

Click on the image to start the animation