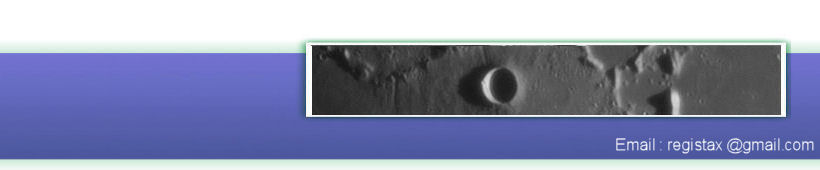
Examples with a more detailed description:
- using Linked Wavelets(1)
- using Linked Wavelets(2)
- using Denoise and Sharpen
Although the waveletpage still looks very much the same the functionality has changed quite a bit. We have new tools implemented to denoise and sharpen images.

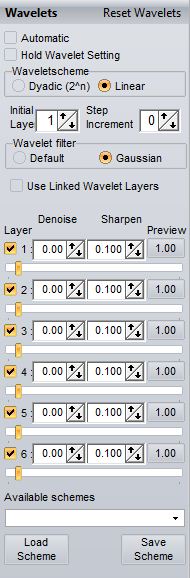
This image shows the default functionality at the wavelets-page. The process-button can be used to force recalculation of the image. Do_ALL is used for larger images where the processing area is smaller than the image itself, pressing DO_ALL will enhance the whole image in several steps. Save Image allows saving the enhanced image in several formats.
Realign with processed allows you to use the result of stacking and (moderate) waveletenhancing as a reference-image to align the frames again. Stack again (disabled when entering wavelets page) is a new function. After stacking you might see areas where for instance "seams" are visible, when you then activate "Show Alignment points" you can decide to disable an alignpoint that might cause the seam. You can enable/disable alignpoints using the ALT and left (enable)/right (disable) mousebuttons. Enabled alignpoints show in green, disabled are shown in red. After disabeling one or more alignpoints you can press "Stack again" which will stack the same set of frames but using only the alignpoints you have left enabled. Show Full Image will show the image completely on screen, some tools we have will not work properly when this checkbox is ON. Show processing Area will show the corners of the current processing area, this can be handy when you dont exactly know which area is "active". This is again mainly usefull for images that are larger than the user set "processing area".
 Reset
Wavelets
Reset
WaveletsThis button will reset the wavelets (filters and sliders) to the default values.
Automatic
When this is ON all changes to any of the waveletsettings will result in a recalculation of the image. When the processing area is choosen rather small this is often not a problem. But for larger processing areas this will result in quite some delays due to heavy processing Thats why this is by default OFF.
Waveletscheme/Initial Step/Increment/Waveletfilter
The current settings can be used as a default.
Use Linked Wavelet Layers
This is a complete new way to use wavelets. Normally the stacked image is "divided" over the wavelet-layers based on the gaussian sharpen filter. When Linked Wavelet Layer is used the stacked image is divided over the sucessive layers based on the denoise and sharpen filters and the setting of the slider. This creates a complete different way to sharpen the images. In an example below we will show/explain one of the ways to use this new tool.
Denoise/Sharpen filters
In RegiStax 5 we introduced a way to use layer 1 to "trap" noise (see trapnoise).
In RegiStax 6 we have expanded this idea, you can now use the trapnoise method for each layer separately. This is why the new filters (default =0.00) are called Denoise filters. In the examples below they are explained in more detail.
Available Schemes/Load/Save Scheme
The available schemes will show previously saved settings (named) for the wavelet-filters/sliders. If you saved these in R5 be aware that the new features are not part of the saved files. You can always first load your old R5 scheme and save it again when you have set additional new settings.